
Unless you’ve been living under a rock for the last few years I’m sure that you’ve all heard of that mystical world that is Azure and some of us may even know people who have visited that land but how do we get there ourselves? Well don’t worry my fair database folk, there’s no need to go hunting for magical rabbit holes or looking for an ethereal portal, all you need is SQL Undercover. This is the first in a series of posts where I’m going to look into Azure, find out how we get started and investigate some of the cool things that we can do with it.
Before we even get started, you’re going to need an Azure account. Microsoft offer a 30 day free trial which will give you everything that you need to get going as well as £150 worth of free credit. Click HERE to get yourself signed up and started.
Creating a Database
So you’ve got yourself an account up and running? Well then I suppose you’re going to want to create a database aren’t you?! The easiest way to get yourself started is to select the ‘SQL Databases’ option from the Azure Portal.

From there, we’ll be taken into the Databases section of the portal. If we had any, this screen would show us details of all our databases. But at the moment, as we haven’t got any databases, it’s blank.
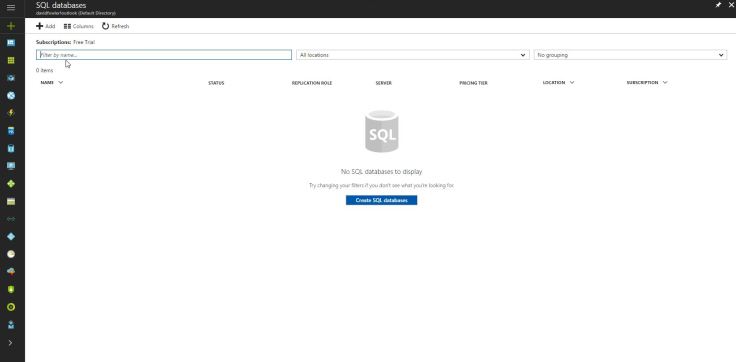
Go on, hit the ‘Create SQL Databases’ button and we’ll get creating one.
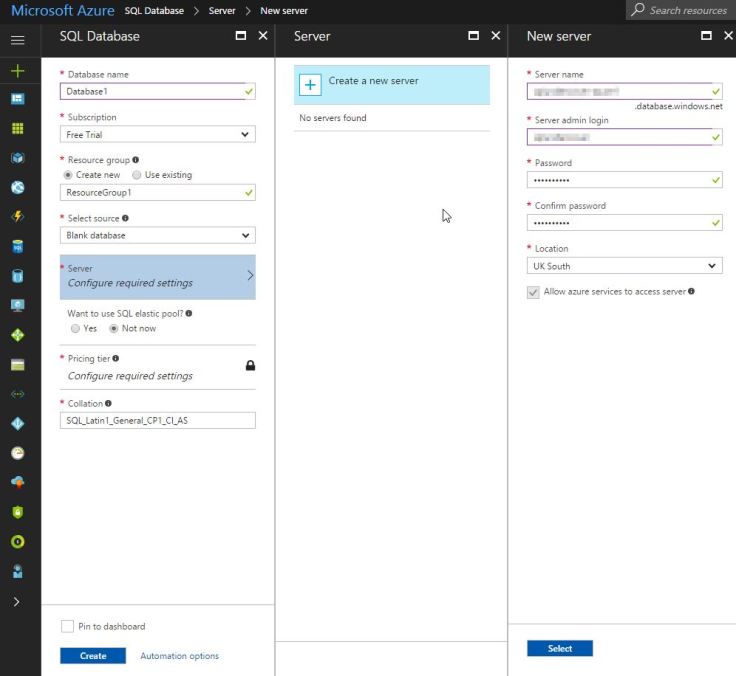
So now we’re presented with a number of different options. We’ll need to give our new database a name, assign it to one of our subscriptions (this will simply be ‘Free Trial’ if you’re using your free trial) and add it to a resource group. If you’ve not created any yet, you’ll need to input a name for a new resource group now and it’ll be created for you.
Assuming that you haven’t done so yet, you’ll also need to setup a new server for the database. Clicking Configure Required Server Settings will bring up the server options. You’ll need to give that server a name, create an admin user and give that user a password. You’ll also want to select a location for your new server, this should be a location that’s geographically close to yourself for best performance (while it might sound cool to have a server in Northern Queensland, it’ll perform like a troll if you’re connecting from the UK – yes I’m looking at you, Mr Buckman! 😉 ).
When you’re done, click ‘Select’ to create the server and ‘Create’ to spin up the database.
It’ll take a few minutes but when it’s created click on the databases option, you’ll see your new database listed on the page and by clicking on the database name you will be given all sorts of options and info. We’ll take a proper look into these in a later post because for now we just want to get ourselves connected up.
Connecting to an Azure Database
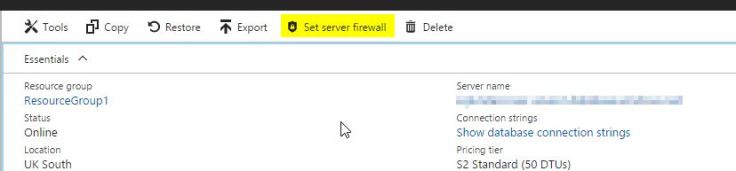
The first thing that you’re going to need to do is create a firewall rule for your client connection. The easiest way to do this is to click on your database name from the Databases screen on the portal. From this screen you can access the firewall settings by clicking on the ‘Set server firewall’ option.
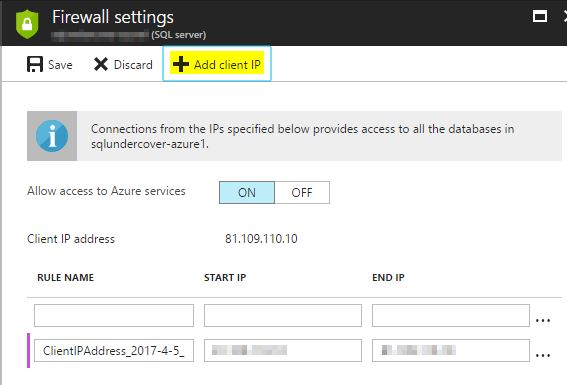
Ensure that ‘Allow access to Azure services’ is on. You’ve now got the option of allowing either a single IP address or a range. If you’re connecting out from behind a single IP address then the ‘Add client IP’ button will automatically create a rule for the IP address that you’re connecting as. If you need to allow an IP range, these will have to be entered manually.
Make sure that you know the name of your server, the fully qualified name is displayed under ‘Firewall Settings’, spin up SSMS and you’re ready to go.
Open a connection to a new SQL Server, pop in the fully qualified name of the server that you’ve just created along with the admin username and password that you assigned earlier and badda bang, you’ve just connected to your first SQL Azure instance.
![2017-05-05 17_24_26-DC1 [Running] - Oracle VM VirtualBox](https://sqlundercover.com/wp-content/uploads/2017/05/2017-05-05-17_24_26-dc1-running-oracle-vm-virtualbox.jpg?w=736)
![2017-05-05 17_25_27-DC1 [Running] - Oracle VM VirtualBox](https://sqlundercover.com/wp-content/uploads/2017/05/2017-05-05-17_25_27-dc1-running-oracle-vm-virtualbox.jpg?w=736)

Leave a comment